
Custom streetwear is made through a structured process: design planning, fabric sourcing, pattern development, sampling, decoration testing, bulk cutting, sewing, quality inspection, and packaging.
From my experience developing custom T-shirts, hoodies, pants, and jackets, the most important step is not sewing. It is approving the correct fabric, fit, and artwork before bulk production begins.
Quick answer: Custom streetwear is made from the brand’s specifications rather than from a finished blank garment. A manufacturer develops the fabric, pattern, sample, printing, labels, and packaging before reproducing the approved product in bulk.
Table of Contents
- Custom Streetwear Production at a Glance
- Step 1: Confirm the Product Brief
- Step 2: Select Fabric and Trims
- Step 3: Develop the Pattern
- Step 4: Make and Review the Sample
- Step 5: Test Printing and Embroidery
- Step 6: Approve Pre-Production Details
- Step 7: Begin Bulk Manufacturing
- Step 8: Inspect, Pack, and Ship
- How Production Changes by Product
- Four Approval Gates Brands Should Use
- Common Production Mistakes
- Frequently Asked Questions
- Final Recommendation
Custom Streetwear Production at a Glance
| Production Stage | Main Purpose | Brand Approval Needed? |
|---|---|---|
| Product brief | Define the design and target customer | Yes |
| Fabric sourcing | Select composition, GSM, color, and finish | Yes |
| Pattern development | Create the garment shape and measurements | Yes |
| Sampling | Test fit, construction, and appearance | Yes |
| Decoration testing | Confirm print or embroidery results | Yes |
| Pre-production setup | Freeze all bulk specifications | Yes |
| Bulk manufacturing | Cut, decorate, sew, and finish garments | Monitored |
| Quality control | Check measurements and workmanship | Reviewed |
| Packing and shipping | Prepare the order for delivery | Confirmed |
A simple T-shirt may move through these stages quickly. A washed hoodie, cargo pant, denim piece, or multi-panel jacket normally requires more testing.
Step 1: Confirm the Product Brief
Production begins with a clear description of what the brand wants to make.
The brief should include:
- Product type
- Reference images or sketches
- Target fit
- Fabric composition
- Preferred GSM
- Colors
- Size range
- Order quantity
- Printing or embroidery
- Wash treatment
- Labels and packaging
- Target delivery date
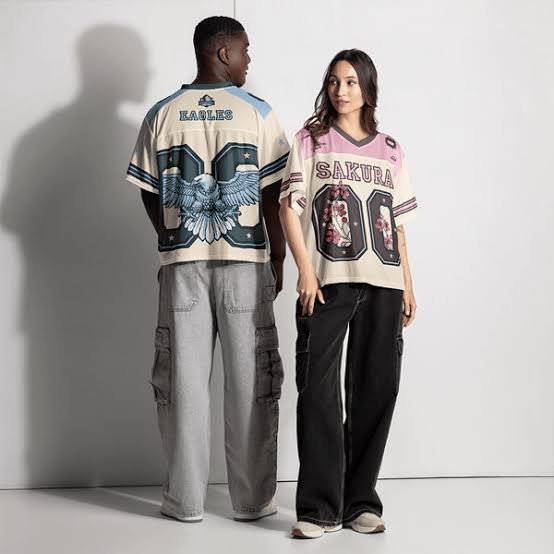
A vague request such as “I want a premium oversized hoodie” is not enough for an accurate sample.
A clearer brief would be:
| Requirement | Example |
|---|---|
| Product | Pullover hoodie |
| Fit | Oversized with dropped shoulders |
| Fabric | Cotton-rich French terry |
| Weight | 400 GSM |
| Color | Washed black |
| Decoration | Large puff print on the back |
| Sizes | S–XXL |
| Quantity | 100 pieces |
| Branding | Neck label, care label, and hangtag |
Brands that do not have a complete tech pack can use an ODM service to develop the product from references. Learn more through FuKi Apparel OEM and ODM Services.
Step 2: Select Fabric and Trims
Fabric affects the fit, comfort, appearance, printing, shrinkage, and production cost.
The manufacturer may provide:
- Available fabric swatches
- Custom fabric suggestions
- Color cards
- Lab dips
- GSM options
- Wash samples
What Should Be Confirmed?
Check:
- Fiber composition
- Finished GSM
- Knitting or weaving structure
- Color
- Hand feel
- Stretch and recovery
- Surface texture
- Shrinkage
- Pilling performance
For example, a 240 GSM cotton jersey may work well for an oversized T-shirt, while a heavyweight hoodie may require French terry or brushed fleece.
The trims must also be selected at this stage.
Common trims include:
- Ribbing
- Zippers
- Drawcords
- Buttons
- Snaps
- Woven labels
- Silicone patches
- Metal logo pieces
Using available materials normally reduces cost and development time. Custom colors, fabrics, and hardware may create higher minimum quantities.
Explore material options through Custom Fabrics for Streetwear.
Step 3: Develop the Pattern
The pattern determines the garment’s shape.
A pattern maker converts the design into separate fabric panels that can be cut and sewn.
For an oversized T-shirt, the pattern controls:
- Shoulder width
- Chest width
- Body length
- Armhole depth
- Sleeve length
- Sleeve opening
- Neckline
- Hem shape
An oversized garment should not be created by simply increasing every measurement of a regular fit.
From my experience, a successful oversized pattern usually combines a wider body and dropped shoulder with carefully controlled length. Without this balance, the garment may look too long rather than intentionally oversized.
The pattern is later graded into the required sizes after the main sample size has been approved.
Step 4: Make and Review the Sample
The first sample turns the design into a physical garment.
It allows the brand to check:
- Fabric
- Measurements
- Fit
- Proportions
- Stitching
- Pocket construction
- Collar or hood shape
- Decoration placement
- Overall appearance
How I Review a Sample
I normally check it in this order:
- Compare it with the product specifications.
- Measure all important points.
- Inspect the garment inside and outside.
- Try it on a suitable fit model.
- Review printing or embroidery.
- Wash-test it when necessary.
- Record corrections with photographs and measurements.
Avoid comments such as “make it more oversized.”
A useful correction would be:
Increase the half-chest measurement by 2 cm, keep the body length unchanged, and move the shoulder seam 1.5 cm lower.
A corrected sample should be requested when the fabric, fit, construction, or major decoration details are changed.
Step 5: Test Printing and Embroidery
Streetwear decoration should be tested on the actual production fabric whenever possible.
Common methods include:
- Screen printing
- Puff printing
- High-density printing
- DTG printing
- Embroidery
- Appliqué
- Silicone printing
- Rhinestones
- Woven or rubber patches
Print Strike-Off
A strike-off is a physical test used to approve:
- Artwork size
- Color
- Placement
- Texture
- Ink coverage
- Edge quality
- Raised print height
Puff printing requires special attention because the ink expands during curing. Thin lines and small spaces may change after expansion.
Embroidery Test
An embroidery test should confirm:
- Thread color
- Stitch density
- Artwork dimensions
- Edge definition
- Fabric puckering
- Backing material
- Placement
Large or dense embroidery may require a heavier fabric or adjusted embroidery program.
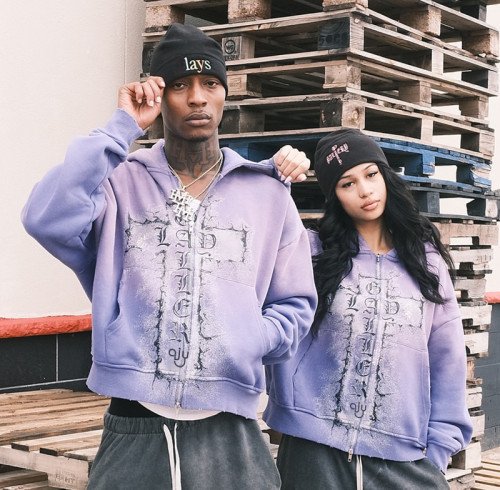
Explore available methods through Custom Streetwear Printing Services.
Step 6: Approve Pre-Production Details
The pre-production sample should represent the product planned for bulk manufacturing.
Before approval, confirm:
- Final fabric
- Final color
- Approved measurements
- Fit and pattern
- Sewing construction
- Print or embroidery
- Wash effect
- Labels
- Trims
- Packaging
- Care instructions
Important changes should not remain as informal promises.
The approved specifications, comment sheets, artwork, and sample should become the reference for bulk production.
For clothing sold in the United States, most textile products require appropriate fiber-content, country-of-origin, and responsible-business information. Care instructions must also be prepared correctly. Brands can review the FTC Clothing and Textiles Guidance before approving labels.
Step 7: Begin Bulk Manufacturing
Once all important details are approved, the manufacturer can begin bulk production.
Fabric Inspection
The fabric is checked for:
- Color variation
- Holes
- Stains
- Knitting or weaving defects
- Incorrect width
- Surface problems
Fabric Relaxation and Cutting
Knitted fabric may be allowed to relax before cutting so that production tension does not distort the garment panels.
The cutting team then:
- Spreads the fabric
- Positions the marker
- Cuts the panels
- Sorts them by size
- Bundles them for production
Printing or Embroidery
Many graphics are applied to individual panels before sewing.
This makes it easier to control placement and keep the fabric flat during decoration.
Sewing
The panels are assembled in the correct production sequence.
For a hoodie, this may include:
- Joining shoulder seams
- Attaching sleeves
- Constructing the hood
- Adding the pocket
- Closing side seams
- Attaching cuffs and bottom rib
- Adding labels
Washing and Finishing
Garment washing may be used to create:
- Softer hand feel
- Pigment fading
- Vintage color
- Distressed appearance
- Controlled shrinkage
After washing, garments are dried, measured, pressed, trimmed, and prepared for inspection.
Step 8: Inspect, Pack, and Ship
Quality control should happen during production, not only after packing.
A practical system checks:
- Fabric quality
- Cutting accuracy
- Print or embroidery
- Sewing workmanship
- Garment measurements
- Color consistency
- Wash results
- Labels
- Packaging
Final Inspection Checklist
| Inspection Area | What Is Checked? |
|---|---|
| Measurements | Key points against approved tolerances |
| Workmanship | Seams, stitches, threads, and symmetry |
| Decoration | Position, color, adhesion, and appearance |
| Fabric | Marks, holes, shading, and surface defects |
| Branding | Labels, hangtags, and logo spelling |
| Packaging | Size stickers, folding, bags, and carton details |
Learn more through FuKi Apparel Quality Control Services.
After inspection, the garments are folded, packed, sorted by size and color, placed into cartons, and prepared for delivery.
Accurate commercial invoices, packing lists, and freight documents are important for international orders. The Trade.gov Export Documentation Guide explains how missing or inaccurate documents can delay cross-border shipments.
How Production Changes by Product
| Product | Main Production Focus |
|---|---|
| Graphic T-shirt | Fabric surface, fit, collar, and printing |
| Oversized hoodie | Heavy fabric, hood shape, rib, and shrinkage |
| Cargo pants | Pocket placement, hardware, and seam strength |
| Denim jeans | Fit, washing, color variation, and hardware |
| Varsity jacket | Multiple materials, patches, lining, and rib |
| Technical jacket | Functional fabric, zippers, seams, and coatings |
Brands beginning with custom manufacturing usually find T-shirts and hoodies easier to manage than denim or complex jackets.
Explore relevant options through Custom T-Shirt Manufacturing and Custom Hoodie Manufacturing.
Four Approval Gates Brands Should Use
To reduce production mistakes, I recommend using four clear approval gates.
| Approval Gate | What Must Be Approved? | Production Risk Prevented |
|---|---|---|
| Material approval | Fabric, color, rib, and trims | Wrong materials |
| Fit approval | Measurements, pattern, and silhouette | Poor fit |
| Decoration approval | Artwork, placement, color, and technique | Incorrect graphics |
| Pre-production approval | Complete finished garment | Bulk inconsistencies |
Do not begin bulk cutting when a major approval is still missing.
This rule may add a small amount of development time, but it can prevent hundreds of incorrect garments.
Common Production Mistakes
Starting With an Incomplete Brief
Missing measurements, artwork, or fabric details create inaccurate quotations and unnecessary sample revisions.
Approving From Photos Only
Photos cannot accurately show fabric weight, hand feel, fit, seam strength, or print texture.
Changing Details During Bulk Production
Late changes may create material waste, delays, and inconsistent garments.
Skipping Wash Testing
Cotton garments may shrink, twist, fade, or change in hand feel after washing.
Focusing Only on the Unit Price
A lower price may use a different fabric, basic construction, or limited quality control.
Treating the First Sample as Bulk Approval
A development sample may still contain temporary fabric, labels, or trims. Confirm which details will change before production.
Frequently Asked Questions
Is custom streetwear made from scratch?
Cut-and-sew streetwear is made from fabric panels according to the brand’s specifications. Blank-based streetwear uses existing garments that are later printed or embroidered.
Do I need a tech pack?
A tech pack is strongly recommended. It records measurements, fabric, construction, artwork, labels, colors, and packaging requirements.
How many samples are needed?
A simple garment may require one or two rounds. Complex fits, washing, embroidery, denim, and jackets may require additional samples.
Is printing completed before or after sewing?
It depends on the design. Many prints are applied to flat fabric panels before sewing, while some decoration is added to the completed garment.
When should bulk production begin?
Bulk production should begin after the fabric, measurements, fit, artwork, construction, labels, and important trims have been approved.
Can a small brand produce custom streetwear?
Yes. A focused first collection with one or two products, limited colors, and a practical MOQ is easier to manage than a large collection.
What should I check before shipment?
Check garment measurements, sewing, decoration, color, labels, packing quantities, carton details, and the final inspection result.
Final Recommendation
Custom streetwear is made through a series of controlled decisions rather than one simple sewing process.
The essential stages are:
- Define the product.
- Select fabric and trims.
- Develop the pattern.
- Make and correct the sample.
- Test printing or embroidery.
- Approve the complete pre-production garment.
- Cut and manufacture the bulk order.
- Inspect, pack, and ship the products.
My main recommendation is simple:
Do not allow bulk production to begin until the material, fit, decoration, and complete pre-production sample have been clearly approved.
FuKi Apparel supports streetwear brands with fabric sourcing, pattern development, sampling, printing, embroidery, garment washing, labels, packaging, quality control, and bulk production.
Visit FuKi Apparel or Contact Our Streetwear Production Team to discuss your custom collection.